


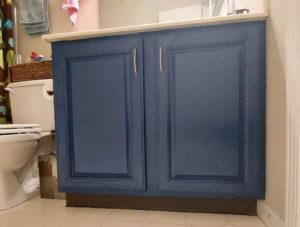
I recently completed my first DIY cabinet painting and overall it was a great success! I’ve been wanting to redo the cabinets/vanities in our upstairs bathrooms and kitchen for years, since before we moved in. I finally made it happen and started with my kids’ bathroom. While I still cared, and wanted it to turn out well, it was just two cabinet doors and a small vanity frame in a bathroom not a lot of people see. This made for a great first project.
I painted the wooden vanity/cabinets for less than $100. I finished the project in a weekend – without sending my kids to my mom’s. I’m very happy with how they turned out and already brainstorming doing my own bathroom. BUT there were definitely some lessons learned. Read below for my full experience from what I bought to what I did and how it all turned out!
SHOP
I went to Lowe’s with a list of materials I thought I wanted and needed based upon my research from variety of blog and product review sources. However, once there I spoke with the paint specialist and ended up not getting everything that was on my list. Per her recommendations, it wasn’t all necessary (ie. wood cleaner, primer.)
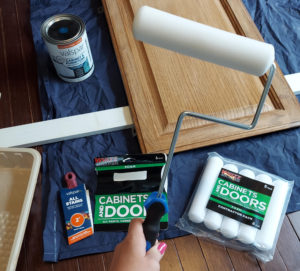
Here’s what I ended up with (total under $100):
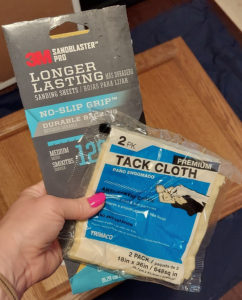
- medium grade sanding sheets (3M Sandblaster Pro Longer Lasting No-Slip Grip pack) – way more than I needed as I only used one, lots for future projects
- tack cloth (2-pack, only needed one)
- cabinets and doors FOAM roller
- extra cabinets and doors foam rollers (didn’t need but have for future projects)
- 2″ short angle “Valspar All Stains” brush
- Valspar Cabinet and Furniture Paint, 29 fl oz (plenty left for touch ups or additional coats in future)
- two handles
- 3M painters tape (didn’t need as found some already had at home, ha)
- 2 paint trays (only used one)
PREP
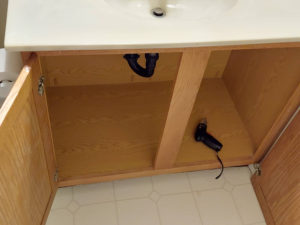
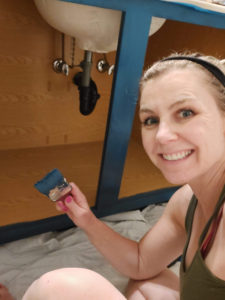
- First things first I cleaned out the vanity and cleaned/cleared the entire bathroom area.
- Next, I removed the doors. I used a small electric screwdriver to quickly take the cabinet doors off.
- Then I got my set up ready. We already had leftover trim sitting around in our basement so I was able to use that to elevate the doors for painting. I put the trim on top of a small tarp. Since I only had two to paint, I was able to use space in my office which was out of the way from the kids, had a window for ventilation, and doors to close the area off from curious hands when needed. For the vanity, I used an old sheet to cover the bathroom floor around where I was painting.
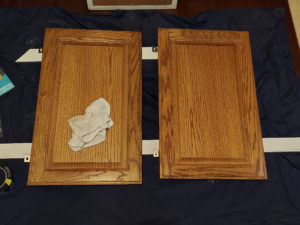
- Next, cleaned the wood. While there are special cleaners out there, I just used a clean towel and water to clean off all of the wood on the vanity base, frame and doors, front and back.
- Then I sanded/roughed up the wood finish. I used a medium grade sand paper sheet and did by hand and went with the grain of the wood. My oldest kid was able to easily help with both cleaning and sanding the wood.
- After that, I taped the vanity as needed around walls, trim, fixture I didn’t remove.
- Lastly, I wiped all of the vanity and doors with a tack (anti-static) cloth just before painting. This removed remaining dust from sanding and any remaining dirt or particles for smooth and clean, ready to paint surfaces.
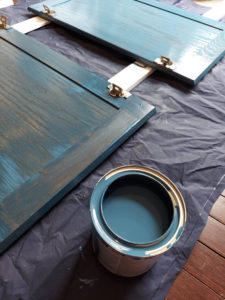
PAINT
Time to paint! At the insistence of the paint specialist at Lowe’s, I did not use a primer. The Valspar Cabinet and Furniture paint boasts that you do not need a primer, however my research indicated some people still highly recommended one.
While it’s exciting, I had to remind myself, you can and WILL need to do multiple coats. Don’t overdo it trying to cover perfectly with the first coat. Also remember the color may look different when drying. I tried to apply the same logic as painting anything else – work off wet edges, thin coats in corners and grooves, use brush where needed to get edges, then use roller for larger surface area and smooth out brush strokes.
Let it dry! Ok, I was not the most patient on this, and my husband didn’t help things. I had a schedule derived from my DIY cabinet painting research and, admittedly, I did not stick to it.
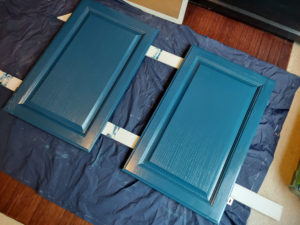
While some suggested to let each coat dry over night/24 hours, I waited only a few hours and made a judgement call based on how dry they were, rather than an exact amount of time. I did start with the back/inside of my cabinet doors so I wasn’t as concerned with the possible consequences of flipping them over too soon. As for the vanity base, it was just fine doing two coats within the same day.
I did let the front of the cabinet doors dry overnight and did the second coat the next morning.

FINISH
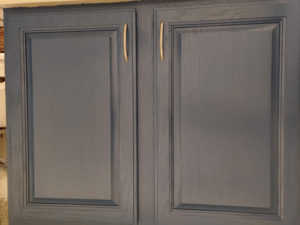
Another recommendation I did not follow was the time to wait before putting any hardware (ie. handles) on the cabinet doors and reattaching them to the vanity. The recommendation I saw was to wait a few days after that final coat of paint. What can I say? We were antsy-pantsy. Plain and simple. And you know what? It was fine.
I did struggle to get the handles attached, something that seemed like it should be significantly easier and faster than it was. This was largely in part because I re-attached the cabinet doors to the vanity, then put handles on. This was clearly a mistake and made placement harder. I also had trouble getting the screws to screw through said holes and into the handle. (My husband had to manually screw them in after trying various drill bits.)
Despite my prep efforts I still managed to get some paint on unwanted places. Nothing I can’t clean up, paint over or live with. It’s not perfect but I did it!
LESSONS LEARNED
If you’ve read through my experience above then you’re already anticipating the BE PATIENT, let the paint dry, take your time and do things right advice. And yes, all that is true. However, I also learned that just because it may be recommended to do it one way or wait a certain amount of time, does not mean that it won’t work and turn out great straying from said guidance.
Was it perfect? No. Did I rush it a bit? Yes. Did I accomplish what I set out to do? Heck yes. Do I love it? Another heck yes!
Next up I plan to do my own bathroom. I will take my time a bit more, ensure thin first layer of paint in the grooves for less likelihood of any clumping or bubbles. I will let the first painted side dry longer before turning the cabinet doors over to paint the other side to prevent white marks from the trim they’re sitting on, or smudges from anything else.
I will try to be more patient and take more time. I will also try to set up in the garage and try to wait for a weekend with lower heat and humidity. I will try. Until then, I’m enjoying the new look in my kids’ bathroom and dreaming up a new look for my own!
Leave a Reply