


Who doesn’t love a good before and after?!
I was SO ecstatic to redo my kitchen island. I’ve been wanting to update my kitchen for years, since before we moved in.
It took just about a week from start to finish, which was longer than planned as I hit some road bumps and wouldn’t consider it finished until I had the details smoothed out – literally with that adhesive liner paper.
Check it out!
ROCKY START
Typically I like to get my paint and get all prepped at least a day before I start painting. However this time around I had an annoying delay right off the bat.
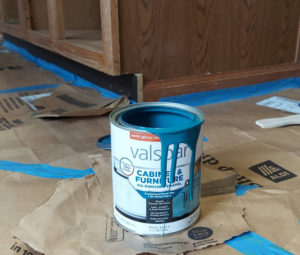
I went to Lowe’s to get the same Valspar Cabinet and Furniture paint that I used on our bathroom cabinets and vanities. When I took the paint to get mixed the guy told me he couldn’t mix it because my color was too dark for the base number.
I hadn’t realized the different base levels and thought I had used the same exact paint for my black and navy-like shades on other projects. Apparently they must have switched it out for the higher base before mixing.
Of course Lowe’s was sold out of the paint with the base 4 that I needed. Getting from another location proved to be a challenge as well. I wasn’t able to go straight to the other store so tried ordering online which turned into a whole thing.
Long story short, I was told they could mix the paint when I picked it up, but when I got there it was already mixed with another color. Thankfully I was able to return it and they had more in stock that they mixed up for me with the color I wanted, “Classic Teal”.
PREP
I got my paint during my lunch break on a Friday and started my prep Friday evening. I would have loved to get started painting Friday, but such is life. It’s good to start painting with fresh lighting in the morning anyways.
Prepping the island included doing the following:
- removing cabinet doors from island
- cleaning out drawers – move all stuff out of the way
- removing drawers from island
- cleaning out island – move all stuff somewhere out of the way
- wiping down island, inside and out, with a wet cloth
- removing any outlet covers
- covering floor and taping island – around floor, counter top, outlets
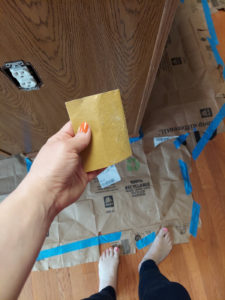
- sanding surfaces to be painted (the paint I use says not necessary but I still do some)
- using tack cloth to wipe off all dust and dirt right before ready to paint
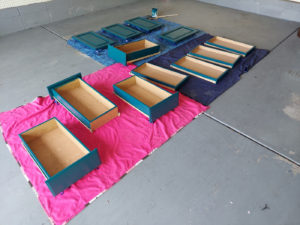
You also need to prep an area to do your cabinet doors and drawers. I used my garage.
The rest of the prep included:
- removing all hardware – knobs and handles
- sweeping out the garage
- laying a tarp(s) down
- wiping cabinet doors and drawers with wet cloth
- sanding surfaces to be painted
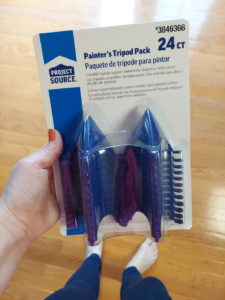
- having something to prop items up for easier painting/drying and edges
- I used “Painter’s Tripods” this time.
- using tack cloth to wipe off all dust and dirt right before ready to paint
Get your small paint brush, cabinet roller and paint tray and you’re ready to go!
(See all items I used in more detail on the blog from my first DIY cabinet project which I’ve been able to reuse.)
LET’S PAINT
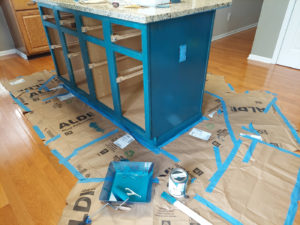
I finished my prep Saturday morning and got started with my painting!
I painted the outside of the island first. Then moved to the garage and painted the inside/back of the cabinet doors and the outside of the drawers. By the time I was done doing my first coat on all of those, the island was ready for a second coat.
Don’t forget to stretch people and takes breaks from all the bending and crouching! I really wanted to knock it out and keep going once I was on a roll, while my family was happily occupied or casually checking in and watching me.
As a result, my lower back was on fire. I was hurting despite my best efforts and was using ice on my cramped hand and a heating pad on my back that night haha!
While I was motivated to get it done, I knew some areas required thin coats and couldn’t be rushed. I also wanted to make sure the paint didn’t pool or glob in any spots.
I ended up doing two to three coats of paint, depending what/where it was. The island looked good with two coats on Saturday and some touch ups on Sunday. I did three coats of paint on the drawers and two coats on the inside/back of the cabinet doors. All of this was finished Sunday, whereas some of the outside/front of the cabinet doors needed another coat. So, I went ahead and did a third coat on all of them, finishing on Monday.
FINISHING TOUCHES
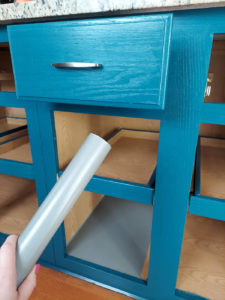
When I went to attach the new handles, the screws were too short to fit through the drawer fronts. I tried using the old screws that I had saved but in the end it was a forced fit. A trip to Home Depot (with all my old and new handles and screws in my purse) and I was back in business.
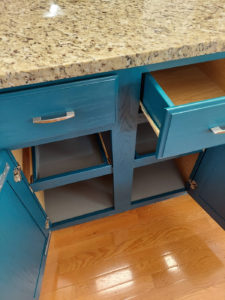
When it came to the adhesive liner paper, it was very difficult for me at first and a total pain, but after a bit I figured out what worked for me as far as measuring, cutting and applying the paper.
TIP: Do NOT peel the paper backing all the way off first. Peel just a bit back, line up and begin to apply to surface. Then peel backing as you slowly smooth liner down to desired surface.
Then, when I was nearing the end I ran out of liner paper. Yet another frustration and I was so close to being doing! So, I took the opportunity to make a Reel using the “Inventing Anna” audio I love (“I don’t have time for this. I don’t have time for you.”), placed an order on Amazon and I was able to get some more the next day.
Now, making the time to actually finish these details was another story.
Finally, on Saturday morning, I finished the rest of the liner paper and reattached the cabinet drawers, reinserted the drawers and pulls and put all our kitchen things back into the island.
The hard work, extra time and back pain was worth it. I love how my DIY island turned out and can’t wait to dive in to my next project: painting the kitchen cabinets white! Stay tuned…
Leave a Reply