


After my first bathroom vanity painting was a success, I could not wait to do another – MINE!
I knew I wanted to use the garage this time as opposed to my office floor like the first one I did. So I waited for a weekend with flexibility as to both time and weather. Needless to say I wanted to wait until it wasn’t TOO hot, humid or storming out.
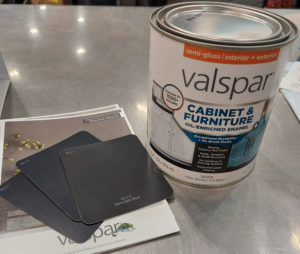
I also had a pretty clear vision from the start, selecting a shade of black paint and some modern rectangular gold handles. I went to Lowe’s on a Thursday night and had the project done by Monday night.

Ready…Paint!
I followed the steps from my first project (outlined in detail on my previous DIY painting post) and also stuck with the same Valspar Cabinet and Furniture Paint. I used that line of paint last time and it applied well without any primer, just clean, sand and get to painting.
Painting in my garage gave me so much more space to work. It also provided me with some great fresh air, helpful for fumes and drying. BUT I was very conscious of closing the garage right away if I wasn’t out there; I didn’t want anything blowing onto my wet paint nor any insects or animals messing with my hard work.
Lessons Applied
My previous experience lent itself nicely and I felt more confident this time around. I applied some lessons learned as to my preferred painting strategy and what worked well for application and drying.
I painted the inside/back of the doors first as I wasn’t as concerned about smudging or accidental marks if turned them too soon to paint the first coat on the fronts.
I tried to be efficient but also more patient than last time. While one thing was drying I tried to paint another. I also tried to paint as soon as I could in the day so as to have more hours of drying time before wanting or needing to flip over. I made sure to go up and do the vanity right away – and tape the walls, floor and trim better!
With the actual painting I knew I needed to take my time and ensure the paint didn’t cluster or clump in the ridges or form drip balls or bubbles off the sides. I knew the first coat was not going to look great, but that I didn’t need to keep putting more paint on; I needed to let it dry and come back later with another full and even coat.
I also learned the hard way last time that the handles need screwed on BEFORE putting the doors back onto the vanity! Oh my goodness. Those handles are a paint to do but much better when you drill a bit bigger hole and have the ability to maneuver the door around more and come at it from different angles for application.
Great Success
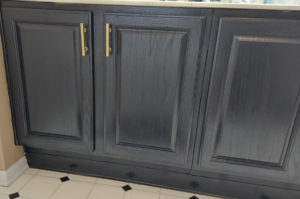
My bathroom vanity turned out exactly as I envisioned it; great success! This made me so happy as I have been wanting to do this for so long, just like my other bathroom.
I put it off painting these bathroom vanities for years, thinking they were bigger and harder projects than I was capable of doing and doing well. Let me tell you, I was very wrong. I wish I’d done them sooner!
If you’re thinking about painting your wooden cabinets and/or wooden vanity, do not wait! Read my first post for my in depth account of what I used and what I did. You won’t be sorry!

Leave a Reply